“Last day, my son unintentionally deleted pictures folder on my MacBook Pro, and emptied the Trash. All these pictures were remarkable memories of my life. Is there any way to recover the deleted Trash files on mac? Thanks!”.
Deleting data is part of our daily life while using our smartphones or computers. We delete data when it becomes unnecessary. But sometimes we may delete data unintentionally, and later realize that they are important. In such a chaotic situation, what can we do?
If you have even lost files or photos on your MacBook and are looking for ways to recover deleted data, then you are in the right place. In this article, we are going to teach you different ways to get your lost files back that actually work. Let’s get started.
Ways to Recover Deleted Files on Mac
In this part, we will teach you about three different ways that will help you to get your deleted files back on Mac, as listed below:
1. Restore from Trash
2. Using Time Machine
3. Using a Data Recovery Tool
Method 1. Restore Deleted Files on Mac from Trash
Whether you have dragged the files into the trash can or manually clicked “delete”, the deleted files will be moved to Trash directly.
It’s very easy to restore deleted files, just go into the Trash and right-click on the file that you want to restore and choose “put back”. The deleted files will be moved from your trash can to the place from where they were located before.
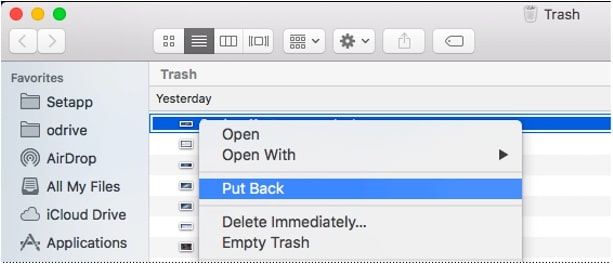
One thing you need to remember here is that if you have deleted the files from Trash or emptied the whole Mac Trash, then they will be gone permanently. And you will need to try the below ways to recover the files you need.
Method 2. Restore Deleted Files on Mac using Time Machine
Time Machine is a built-in utility for Mac that automatically creates backup of user’s personal data such as documents, emails, images, videos and applications. This will allow the user to easily restore data that’s lost or accidentally deleted.
You need an external storage device having enough storage to store backup files, it can be a flash drive or external hard drive. Once the external device is inserted into mac, follow the steps given below to complete the configuration process.
How to Set Up Time Machine?
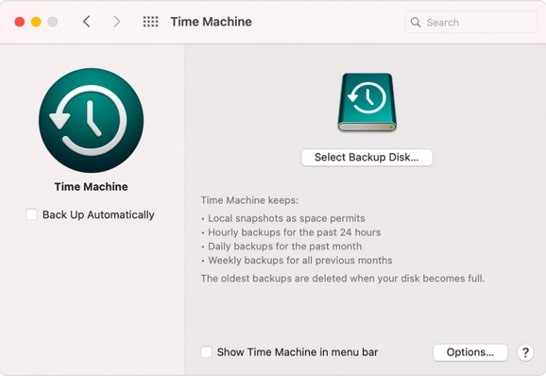
For configuration purposes, you have to choose the “Time Machine” backup application from your system preferences and run it.
Now here you have to “Select Backup Disk” to choose a drive where the backup will be stored. It is suggested to check the “Back Up Automatically” option.
How to Restore Mac Files Using Time Machine?
Can’t find your important files on Mac? If you regularly backup with Time Machine, you can go back in time to recover lost documents, videos, photos, etc. Let’s follow the steps given below to learn how to restore specific files from a Time Machine backup:
Step 1: Enter Time Machine
Now click the “Time Machine” icon on the menu bar and choose “Enter Time Machine” from the list. Or you can also find this in System Preferences.
Step 2: Find a File
A timeline will be shown on the edge of your screen that helps to find the exact files quickly. You can also use the arrow to browse through backup or search the specific file by date or phrase.
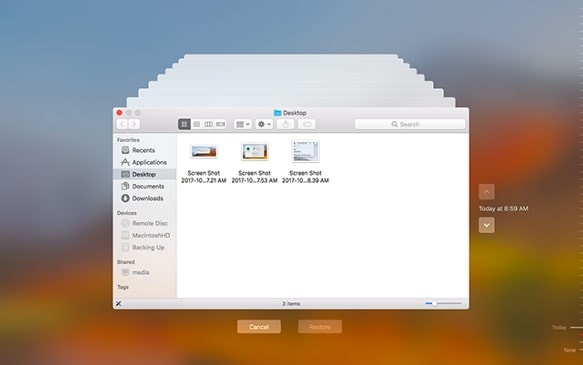
Step 3: Restore a File
Once you find the required file, preview it by pressing the space button and click the “Restore” button and if it asks to enter your system password, enter it. The file will appear at its original location.
Note:
If you haven’t set up the Time Machine before files were deleted, this method doesn’t work for you. Is there another way? Of course, in the next part we will teach you how to recover deleted files on Mac without backup.
Method 3: Recover Permanently Delete Files on Mac with AnyRecover
The truth is, when a file is deleted from the hard drive, it is not completely erased, but still stays on the drive in an invisible way. To recover the data, you will need a tool that can search deep into the hard drive, and then get them back to you.
For this purpose, we will use a third-party data recovery tool called iMyFone AnyRecover it’s very popular for recovering deleted files and folders. With a deep and all-round scan, AnyRecover for Mac is able to recover the seemingly permanently deleted files with ease.
Some key features of AnyRecover:
- Recover data from various data storage device such as SD cards, USB drives, hard drives, SSDs, cameras and more.
- Supports all kinds of file types, like Word documents, PDF files, pictures, videos, audios, etc.
- This software is safe and super easy to use, even for first-time users without much tech knowledge.
- Available for macOS 10.10 – 11.0, no worries about its compatibility.
Recover Deleted Files on Mac in Just 3 Easy Steps
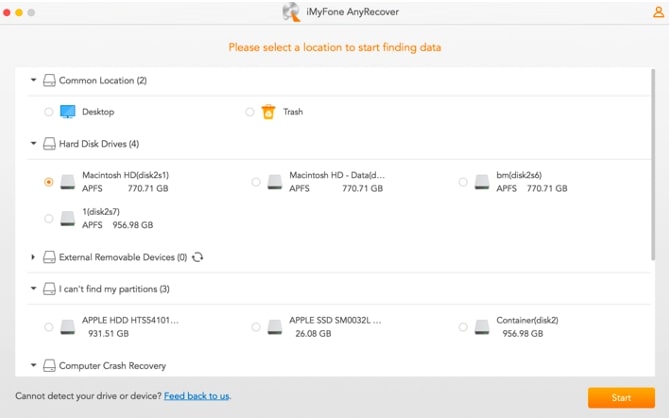
Step 1– Select
Launch AnyRecover for Mac and choose the location such as Trash, Hard Disk Drive or any other location from which you want to recover files.
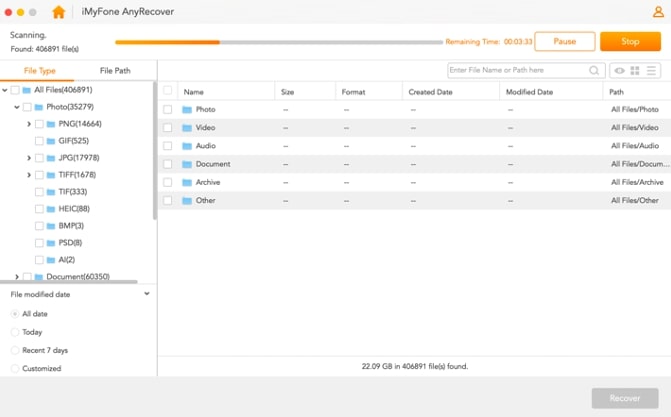
Step 2– Scan
The scanning process of AnyRecover is relatively fast, with scanning results displayed in real time. It will list all deleted files in a sorted way according to the file types.
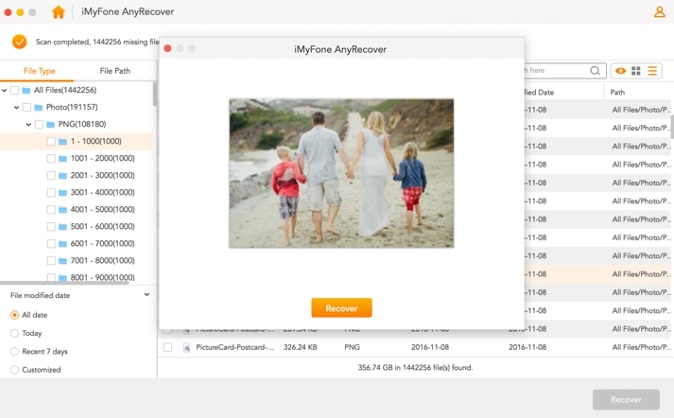
Step 3 – Recover
AnyRecover has a nice “Preview” feature that helps you to preview the content before recovery. Just select the files you need and then click “Recover”, all you lost files will be back.
Try AnyRecover for Free
Tips to Protect Your Data on a Mac
In the above section, we have taught you ways on how to recover deleted data on mac with working methods. Now let’s look at some tips that can help you to avoid data lost on mac in future.
- Establish good habits, like using the “Undo” feature immediately when things go wrong and having a battery back-up system.
- Always create a backup. Store a copy of your data on the cloud or back them up with Time Machine.
- Never install unknown applications and cracked software in your mac OS device.
To Sum Up
We have expressed different ways of recovering deleted data on Mac in this article, as well as the tips to prevent data loss in the future. Just try them and choose the best way that suits your needs.


![How To Automatically Tag MP3s and Edit Music Data [Windows + Mac]](https://www.techpcvipers.com/wp-content/uploads/2019/10/music-tag-180x180.jpg "How To Automatically Tag MP3s and Edit Music Data [Windows + Mac]")
