Ultra HD or 4k is no longer just a talk for the future. If anything, it is the video quality preferred by people all around the world for quite a few years now, especially in movie theatres. TVs are slowly adapting and top online video streaming service providers like Amazon Prime, Netflix, Vimeo, YouTube and many others support 4K uploading and viewing as well. Google is also taking extra steps to make 4K more popular and accessible from home, like providing huge boosts in bandwidth to Google Fiber users and changing algorithms in the Chrome browser. The cinema quality 4K is now on an increasing number of smartphones, tablets, laptops and TV sets and the latest action cameras and DSLRs can shoot 4K now. And why wouldn’t they? 4K, like its name, displays four times the regular quality we’re used to, which makes for a great viewing experience, particularly on 50+ inch screens. While on one hand is its enticing appeal, on the other hand weighing it down are a few disadvantages: it requires more bandwidth than most of us can afford and it takes up a lot of storage space. Moreover, on a lot of devices that a regular person owns and most frequently uses, you can’t even tell the difference between 4k and anything higher than the standard HD quality.
Sometimes, Less is More
On most days, the quality offered by 1920x 1080 (1080p) resolution is more than sufficient to watch any video file while the 3840x 2160 resolution of UHD is perfect only in theatres. This is because the huge size and high bit rate of 4K videos make it challenging to play on many programs and media devices. Not only should your video player software be compatible with UHD, but your hardware configuration (like your graphics card and processor) should be good enough to crunch the data of 4K. Or you will end up with stuttering, choppy, jerky and laggy video playback. So, for now, for the sake of our sanity and smooth playback, we need to go with lesser pixels, aka 1080p. The number maybe be lesser, but it is more pleasing.
How to Compress 4K video file to 1080p?
Now that you know 1080p can give you more speed while saving storage space, it brings us to the only important question: how to reduce the quality of a video from 4K to 1080p? Most existing video converter software doesn’t have the tools to take in 4K files. Others are either too old and will crash or hang when you try to. All this calls for a newer, better HD video converter that takes advantage of a modern system’s powerful GPU and multi-threaded, multi-core processors. WinX HD Video Converter Deluxe is the best free HD video converter out there that can downsize 4K videos with little effort. It is also the only tool that is capable of level-3 hardware acceleration, which is a requirement to obtain super-fast processing speed and prevent the player from freezing or crashing. Download it today on your Windows systems, or enter their limited time giveaway to win a licensed version of this best free HD video converter. Once that’s done, you are only a few easy steps away from downscaling 4K video files to 1080p.
A little more about WinX HD Video Converter Deluxe
WinX HD Video Converter Deluxe is not only the best free HD video converter you can find but also a great tool for downscaling videos from YouTube and other services at blazing speeds. It can handle any sensible resolution in nearly any format and compress or convert it for use on most devices. It also allows you to change video subtitles and language. Truly, it is an all-in-one video converter.
Step by step instructions to convert/compress 4k to 1080P:
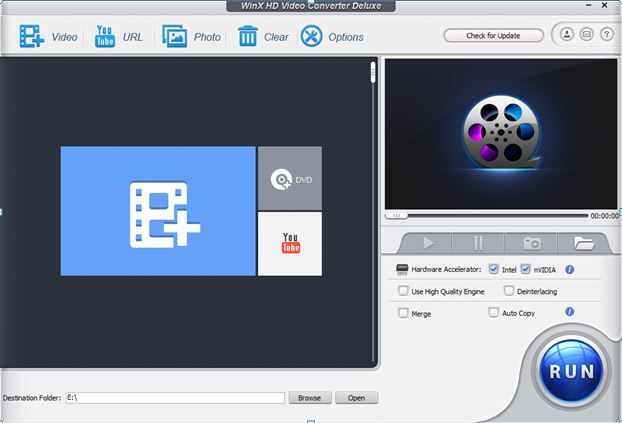
Step 1: Download, install and open the app
Once you have downloaded and installed WinX HD Video Converter Deluxe, open up this best free HD video converter to begin converting.
Step 2: Select source 4K file
Click on ‘+Video’ options on the upper left of the app and select your source 4K video file. DJI Drones, GoPro HERO6, Samsung Galaxy S9/S8, iPhone (X) camera made or any HEVC or H.264 video files are supported. Alternatively, you can also drag and drop your video file directly into the program. It supports import of multiple files at once.
Step 3: Set output file profile
Right after the file loads, a pop-up window will ask you how you want your output file to be. This is super easy because the software has more than 400 optimized presets to suit every need, including but not limited to YouTube, Facebook, Final Cut Pro, iTunes, iMovie, Microsoft Xbox One, Sony PS4, DJI Drones, GoPro HERO6, Samsung Galaxy Note 8, Samsung Galaxy S8, iPad Pro and iPhone 8. Under the ‘PC general video’ category of presets, the very popular ‘MP4’ format option is available which is perfect for almost all devices and media players. However, you can also choose to go with WMV, FLV, AVI and more. Select what suits you best and click ‘OK’.
Step 4: Choose output file resolution
Click on the gear icon next to the name of your video to open the settings window. Find the ‘Resolution’ drop down a set of options and select 1920×1080 to set output file resolution to 1080p. You can also click on ‘Customize’ and manually type this in. Ideally, leave other audio and video options as it is. But if you want a smaller video size without compromising on quality, you can change frame rate from ‘keep origin’ to ’24 fps’. Once done, Click ‘Apply to All’ and then ‘OK’.
Step 5: Click ‘Run’ to start
Once everything is set how you want it, click the big blue ‘Run’ button to begin downscaling your 4K video to 1080p at unimaginable speeds.
Optional Settings – Customize 4K to 1080p Compression
1. Edit Video
Click on ‘Edit’ option under the video if you would like to add external subtitles, remove borders, crop video frame or remove a part of the video.
2. Select Destination Folder
A default location to save the converted 1080p file will already be set by the software, but you can change this by clicking on ‘Browse’ on the main page of the app and choose where the file should be saved instead.
3. Enable hardware acceleration
To ensure a smooth and speed decoding, encoding and 4K video processing, check the Intel and/or NVidia boxes to power up your hardware accelerator, especially if you’re compressing or converting a large H.264/ HECV video. You can find this in the video preview pane on the right.
Final Thoughts
WinX HD Video Converter Deluxe, the best free HD video converter, comes to our rescue when we can’t play our favorite videos on our once-reliable devices and players because of the barrier of 4K. It converts and compresses large 4K files to smaller 1080p videos in a matter of minutes without once making the computer crash or slow thanks to its clever utilization of hardware acceleration. Download WinX HD Video Converter Deluxe today – it is undoubtedly the best HD video converter you can find. Remember, you can also get your hands on one by participating in their exclusive giveaway.


 to 1080P (HD) on Win/Mac Easily)